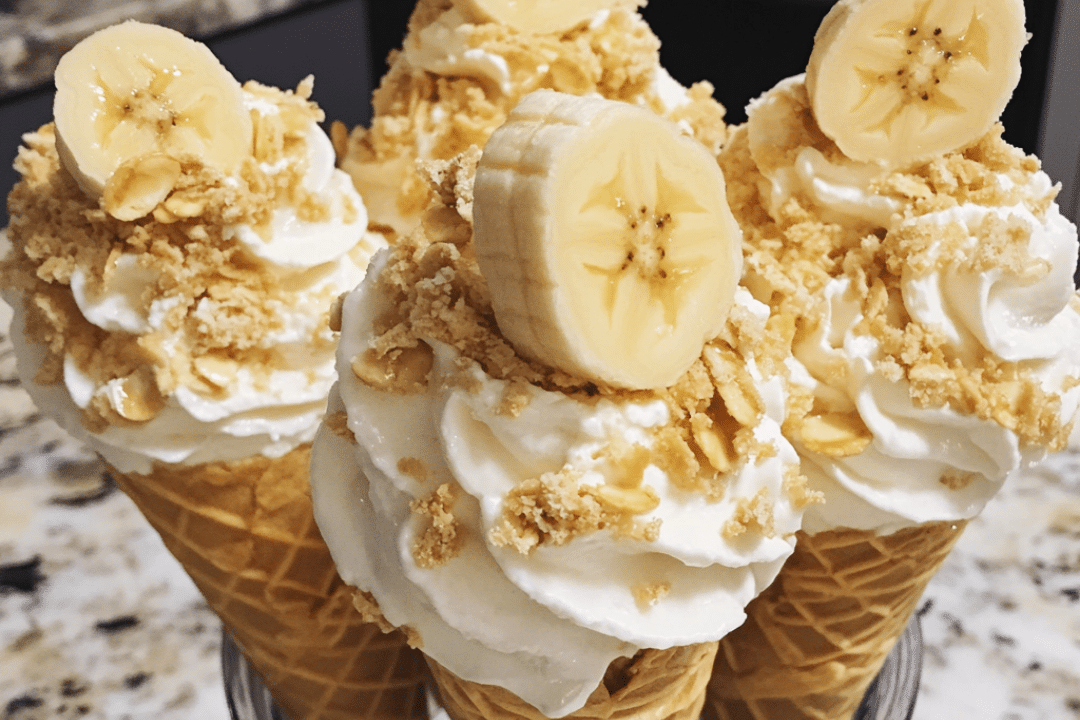
Banana Pudding Cheesecake Cones are a delightful and creative twist on the classic banana pudding dessert. Served in crunchy sugar cones, this handheld treat combines the creamy richness of cheesecake with the sweet, nostalgic flavors of banana pudding. Each cone is filled with a luscious mixture of cream cheese, whipped cream, mashed bananas, and crushed vanilla wafers, creating a delightful contrast of creamy and crunchy textures. This easy-to-make dessert is perfect for parties, picnics, or a sweet snack any time of year. It’s a fun and portable way to enjoy a classic dessert with a modern, bite-sized presentation.
The simplicity of this recipe makes it an ideal choice for anyone looking for a quick and impressive dessert. No baking is required, and the prep time is minimal. After preparing the filling, you just spoon it into sugar cones and let them chill in the freezer for a couple of hours. The result is a sweet, creamy treat that’s sure to be a hit with both kids and adults alike. With only a few ingredients, you can create a dessert that brings a smile to anyone’s face!
Why You’ll Love This Recipe
These Banana Pudding Cheesecake Cones are the ultimate fun and easy dessert. They offer all the creamy goodness of traditional banana pudding and cheesecake, but with a playful twist. The use of sugar cones as the base makes them not only cute but also convenient and mess-free, making them a perfect treat for parties, gatherings, or a fun family dessert night. The crunchy texture of the sugar cone paired with the smooth, sweet cheesecake filling offers the perfect balance, and the banana and vanilla wafer flavors will bring back fond memories of childhood. Plus, this dessert is no-bake, meaning you won’t have to spend hours in the kitchen. With just a few simple ingredients, you can create a crowd-pleasing treat that everyone will love.
Ingredients
- Cream cheese
- Granulated sugar
- Vanilla extract
- Heavy cream
- Ripe bananas
- Vanilla wafers
- Sugar cones
Variations
- Add Chocolate: For a chocolate twist, sprinkle mini chocolate chips or drizzle melted chocolate over the tops of the cones before freezing.
- Coconut Flavored: Add shredded coconut to the mixture for an extra layer of flavor that complements the banana and vanilla wafers.
- Use Graham Cracker Crumbs: Instead of crushed vanilla wafers, try graham cracker crumbs for a slightly different taste and texture.
- Non-Dairy Version: Swap the cream cheese and heavy cream with dairy-free alternatives to make this dessert vegan-friendly.
- Fruit Toppings: Top each cone with sliced fresh fruit like strawberries, blueberries, or kiwi for a colorful and refreshing addition.
How to Make the Recipe
Step 1: Prepare the Cream Cheese Mixture
In a large mixing bowl, beat together the softened cream cheese, granulated sugar, and vanilla extract until smooth and creamy.
Step 2: Whip the Heavy Cream
In a separate bowl, whip the heavy cream using a hand mixer or stand mixer until stiff peaks form.
Step 3: Combine the Mixtures
Gently fold the whipped cream into the cream cheese mixture until fully incorporated, ensuring a light and airy texture.
Step 4: Add the Bananas and Wafers
Fold in the mashed ripe bananas and crushed vanilla wafers. Mix until everything is evenly distributed throughout the filling.
Step 5: Spoon into Cones
Spoon the cheesecake mixture into the sugar cones, filling them generously. Be sure to pack the mixture in well to avoid any air pockets.
Step 6: Freeze and Serve
Place the filled cones in the freezer and allow them to chill for at least 2 hours, or until the mixture is firm. Once ready, serve immediately or keep them frozen until you’re ready to enjoy.
Tips for Making the Recipe
- Ensure the cream cheese is softened: This makes it easier to blend with the sugar and vanilla extract, ensuring a smooth mixture.
- Don’t over-whip the heavy cream: Whip the heavy cream until stiff peaks form, but be careful not to overdo it, as it can cause the cream to become too thick or grainy.
- Use ripe bananas: Ripe bananas have the best flavor and will mash smoothly, making the filling extra creamy.
- Pack the mixture tightly: When filling the sugar cones, pack the mixture in to avoid air pockets, ensuring a solid cone.
- Freeze long enough: Make sure to freeze the cones for at least 2 hours so the filling firms up and holds its shape.
How to Serve
Banana Pudding Cheesecake Cones are best served directly from the freezer, as they hold their shape and texture when chilled. They make great handheld treats for parties, barbecues, and potlucks. Serve them as an individual dessert for each guest or offer them as a fun, shareable option on a dessert table. You can also top the cones with additional crushed vanilla wafers, whipped cream, or extra banana slices for a more decorative presentation.
Make Ahead and Storage
Storing Leftovers
Store any leftover Banana Pudding Cheesecake Cones in an airtight container in the freezer for up to 3 days. The cones will stay fresh and delicious if kept frozen.
Freezing
Since this dessert is frozen, it’s perfect for making ahead. After filling the sugar cones with the cheesecake mixture, you can freeze them for up to 2 days before serving. Just make sure to wrap each cone tightly or store them in an airtight container to prevent freezer burn.
Reheating
These cones are best served frozen and do not need reheating. Simply remove them from the freezer, serve, and enjoy!
FAQs
1. Can I use a different type of cone?
Yes, you can use any type of cone, but sugar cones are preferred due to their sweetness and sturdiness.
2. Can I make these ahead of time?
Absolutely! These cones need to freeze for at least 2 hours, so they can easily be prepared in advance.
3. How can I prevent the mixture from melting too quickly?
Store the cones in the freezer until ready to serve to maintain their shape and texture.
4. Can I use a different fruit?
Yes, you can substitute the bananas with other fruits like strawberries, peaches, or even mango for a different flavor profile.
5. Is there a non-dairy alternative to cream cheese?
Yes, you can use dairy-free cream cheese to make this dessert vegan-friendly.
6. Can I make this recipe without the sugar cones?
You can use small cups or even mini pie crusts if you don’t have sugar cones, but the sugar cone adds a nice crunch and sweetness.
7. How long will the cones last in the freezer?
The cones will last for about 3 days in the freezer, but they are best served within 1–2 days for optimal freshness.
8. Can I use low-fat cream cheese?
Yes, you can use low-fat cream cheese, but the texture might be a little less rich.
9. How do I know if the whipped cream has reached stiff peaks?
The whipped cream should form stiff peaks that hold their shape when the beaters are lifted. If the cream starts to separate or turn into butter, you’ve over-whipped it.
10. Can I use whipped topping instead of whipped cream?
Yes, you can substitute whipped topping, but fresh whipped cream will give the best flavor and texture.
Conclusion
Banana Pudding Cheesecake Cones are a fun and delicious twist on two classic desserts. This no-bake treat is easy to make, requires minimal ingredients, and can be prepared ahead of time, making it a great option for parties and gatherings. The combination of creamy cheesecake, sweet banana, and crunchy vanilla wafers packed in a sugar cone is sure to be a hit with everyone. Whether you’re serving them for a holiday, a summer party, or just a sweet snack, these cones will be enjoyed by all!
Print
Banana Pudding Cheesecake Cones: A Fun and Delicious Twist on a Classic Dessert
- Total Time: 2 hours 15 minutes
- Yield: 6 cones 1x
Description
These creamy, dreamy banana pudding cheesecake cones are a fun and portable twist on a classic dessert. With a smooth cheesecake filling, ripe bananas, and a crunchy vanilla wafer base, these cones will be a hit at your next gathering or as a sweet treat for any occasion.
Ingredients
- 1 package (8 oz) cream cheese, softened
- 1/2 cup granulated sugar
- 1 tsp vanilla extract
- 1 cup heavy cream
- 2 ripe bananas, mashed
- 1 cup vanilla wafers, crushed
- 6 sugar cones
Instructions
- Prepare the Cheesecake Mixture:
- In a large mixing bowl, beat the softened cream cheese, sugar, and vanilla extract until smooth and creamy.
- Whip the Heavy Cream:
- In a separate bowl, whip the heavy cream using an electric mixer until stiff peaks form. This will give the filling a light and airy texture.
- Combine the Mixtures:
- Gently fold the whipped cream into the cream cheese mixture until fully incorporated.
- Add Bananas and Vanilla Wafers:
- Fold in the mashed bananas and crushed vanilla wafers. This will give the filling the classic banana pudding flavor with a bit of crunch.
- Assemble the Cones:
- Spoon the banana pudding cheesecake mixture into the sugar cones, filling them generously. You can gently tap the cones on the counter to pack the filling in evenly.
- Freeze:
- Place the filled cones on a tray and freeze for at least 2 hours, or until the filling is firm and set.
Notes
- You can decorate the cones with extra crushed vanilla wafers or banana slices for a garnish.
- For an extra indulgent twist, drizzle caramel or chocolate syrup over the cones before serving.
- If you can’t find sugar cones, you can use regular waffle cones instead.
- Prep Time: 15 minutes
- Cook Time: 0 minutes

