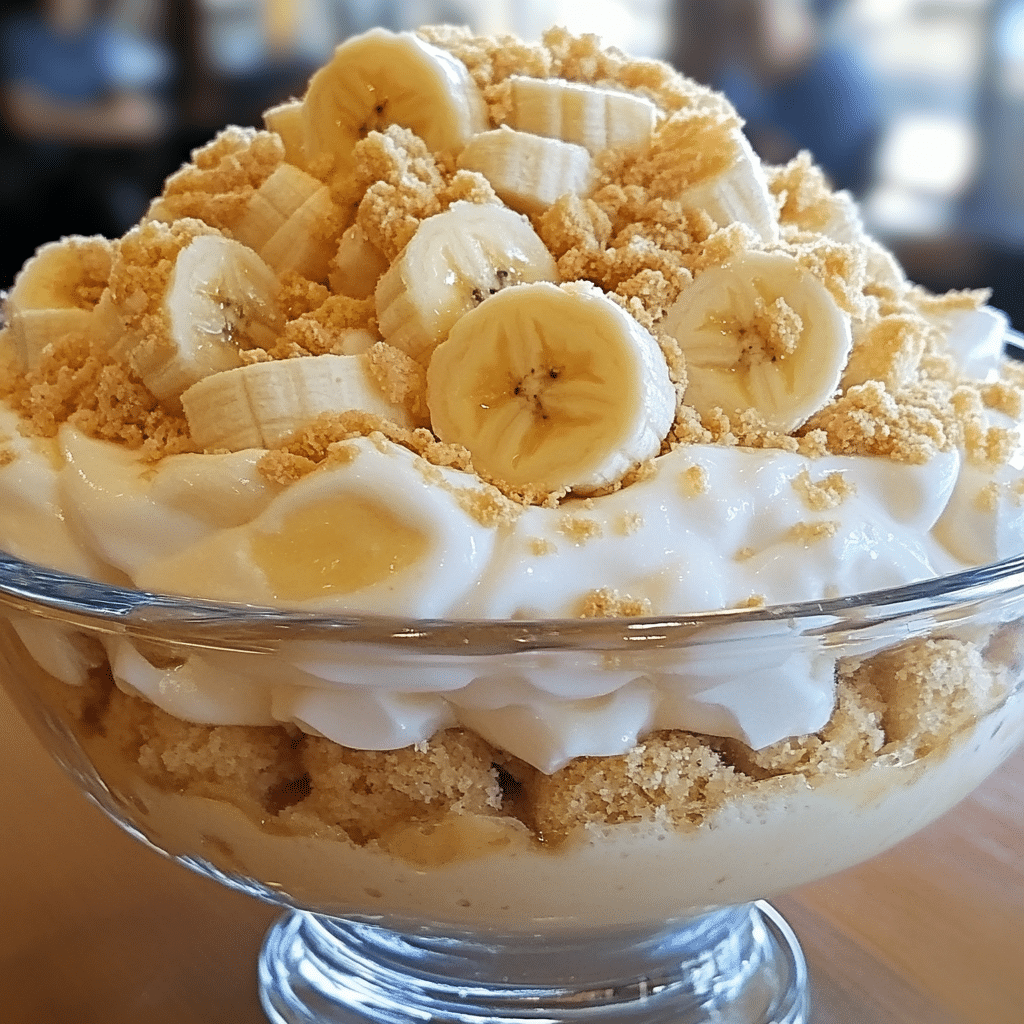
Magnolia Bakery’s Famous Banana Pudding has become an iconic dessert, beloved by many for its creamy layers of pudding, fresh bananas, and crunchy vanilla wafers. Known for its rich texture and balanced sweetness, this dessert is a classic in the world of comfort food. Whether you’re preparing it for a family gathering, a potluck, or simply to indulge yourself, it’s a dessert that everyone will rave about. Easy to make and absolutely delicious, this banana pudding is the perfect treat for any occasion.
This recipe captures the essence of Magnolia Bakery’s version, with a few simple ingredients that come together to create a sweet and satisfying dessert. From the creamy pudding filling to the buttery wafers and fresh banana slices, each bite is a delightful combination of textures and flavors. It’s a dessert that will transport you to the heart of New York City, where the original bakery first made its mark. The best part? You can make it at home, and it’s sure to become a family favorite.
Why You’ll Love This Recipe
1. Rich and Creamy Texture
The combination of heavy cream, sweetened condensed milk, and vanilla pudding creates a velvety smooth filling that melts in your mouth. This decadent texture is what makes the banana pudding so irresistible.
2. Easy to Make
With just a few ingredients and simple steps, this dessert comes together quickly. No need for complicated techniques or hours in the kitchen!
3. Perfectly Balanced Flavor
The sweet, creamy pudding paired with the natural sweetness of ripe bananas and the crunch of vanilla wafers makes this dessert perfectly balanced in flavor and texture.
4. No Baking Required
This banana pudding is a no-bake dessert, making it an ideal choice for warmer weather or when you don’t want to turn on the oven.
5. Great for Any Occasion
Whether you’re celebrating a holiday, attending a gathering, or simply craving something sweet, this banana pudding is the perfect crowd-pleaser. It’s easy to prepare in advance and can be served to a group of guests.

Ingredients
- Sweetened condensed milk
- Ice cold water
- Instant vanilla pudding mix (Jell-O brand recommended)
- Heavy cream
- Vanilla wafers (Nabisco Nilla Wafers recommended)
- Ripe bananas, sliced
Variations
1. Chocolate Banana Pudding
For a chocolate twist, sprinkle cocoa powder over the vanilla wafers or layer in some chocolate pudding for a delicious mix of flavors.
2. Caramel Banana Pudding
Add a layer of caramel sauce between the bananas for a sweet, buttery twist that enhances the flavors of the pudding.
3. Peanut Butter Banana Pudding
Layer in some peanut butter to create a nutty, savory element that pairs beautifully with the bananas and vanilla wafers.
4. Coconut Banana Pudding
Add shredded coconut on top of the pudding layers for an extra layer of texture and a subtle tropical flavor that complements the bananas.
5. Berry Banana Pudding
Incorporate fresh berries like strawberries or blueberries between the layers for a fruity twist that adds color and flavor.
How to Make the Recipe
Step 1: Prepare the Pudding
In a large bowl, whisk together the sweetened condensed milk and ice cold water until smooth. Add the instant vanilla pudding mix and continue whisking until the mixture thickens, about 2 minutes. Set aside.
Step 2: Whip the Cream
In a separate bowl, use a hand mixer or stand mixer to beat the heavy cream until stiff peaks form. This will create a light and airy whipped cream that will make your pudding extra creamy.
Step 3: Fold in the Whipped Cream
Gently fold the whipped cream into the pudding mixture, being careful not to deflate the cream. This will create the creamy, fluffy filling for your banana pudding.
Step 4: Layer the Dessert
In a large serving dish or individual serving cups, begin by laying down a layer of vanilla wafers on the bottom. Top with a layer of sliced bananas, followed by a layer of the pudding mixture. Repeat the layers until you’ve used up all the ingredients, finishing with a layer of pudding on top.
Step 5: Chill the Pudding
Cover the banana pudding with plastic wrap and refrigerate for at least 4 hours, or preferably overnight. This allows the flavors to meld together and the wafers to soften, creating the perfect texture.
Tips for Making the Recipe
- Use Cold Water: Make sure your water is ice cold when mixing with the sweetened condensed milk to ensure the pudding sets properly.
- Layering: Be generous with the layers of bananas and wafers to ensure every bite is perfectly balanced with creamy pudding, fresh fruit, and crunch.
- Overnight Chilling: The longer you let the banana pudding chill, the better it will taste as the flavors have time to develop. Ideally, let it set overnight.
- Whip the Cream Well: Make sure the whipped cream forms stiff peaks so that it gives the pudding a light, fluffy texture.
- Choose Ripe Bananas: Make sure the bananas are ripe but not overly ripe. This gives the pudding the perfect sweetness and texture.

How to Serve
This banana pudding can be served in a variety of ways:
- In a Large Dish: For a traditional presentation, serve the banana pudding in a large glass trifle dish or casserole dish. This allows everyone to scoop out servings from the same dish.
- Individual Servings: For a more elegant touch, serve the pudding in individual cups or jars for each guest.
- Topped with Whipped Cream: Add a dollop of whipped cream or a sprinkle of crushed vanilla wafers on top before serving for an extra touch of texture.
Make Ahead and Storage
Storing Leftovers
Store any leftover banana pudding in an airtight container in the refrigerator for up to 2-3 days. The pudding is best enjoyed within this time frame, as the bananas may brown over time.
Freezing
It’s not recommended to freeze banana pudding, as the texture of the bananas and whipped cream can change when thawed. The pudding is best served fresh or within a few days of making it.
Reheating
Since this is a no-bake dessert, there’s no need to heat it. Simply chill the banana pudding before serving, and it will be the perfect temperature to enjoy.
FAQs
1. Can I use homemade whipped cream instead of store-bought?
Yes, homemade whipped cream works perfectly in this recipe. Just make sure it’s whipped to stiff peaks before folding it into the pudding.
2. Can I use low-fat or non-dairy alternatives?
You can substitute the heavy cream with a non-dairy whipped topping or low-fat whipped cream, but the texture and richness may vary.
3. How long should I chill the banana pudding?
For the best flavor and texture, chill the banana pudding for at least 4 hours, but overnight is ideal for the wafers to soften fully.
4. Can I use a different type of cookie?
Nilla Wafers are recommended for their crunchy texture and mild vanilla flavor, but you can substitute with other cookies like graham crackers or shortbread if you prefer.
5. Can I make this banana pudding without bananas?
While bananas are a key ingredient, you could try substituting them with other fruits, such as strawberries or peaches, for a different flavor.
6. Can I use a different brand of vanilla pudding mix?
While Jell-O vanilla pudding mix is recommended for the best flavor, any instant vanilla pudding mix will work in this recipe.
7. Can I make this banana pudding ahead of time?
Yes, this pudding can be made ahead of time and stored in the fridge until you’re ready to serve it. It’s even better after it’s had time to set.
8. What size serving dish should I use?
A 9×13-inch baking dish or similar-sized trifle dish works well for serving this recipe. Adjust depending on how many servings you need.
9. Can I add other toppings to the pudding?
Feel free to add toppings like crushed Nilla Wafers, chocolate shavings, or even a drizzle of caramel for extra flavor.
10. How do I prevent the bananas from turning brown?
If you’re serving the banana pudding later, you can sprinkle a little lemon juice on the banana slices to help prevent browning.

Conclusion
Magnolia Bakery’s Famous Banana Pudding is the ultimate comfort dessert. With its creamy, indulgent layers of vanilla pudding, fresh bananas, and crunchy Nilla Wafers, it’s the perfect treat for any occasion. Easy to make and impossible to resist, this dessert is sure to become a family favorite. The best part? It only gets better after sitting in the fridge for a few hours, allowing the flavors to blend together perfectly. Whether you’re a fan of the classic version or prefer to try out fun variations, this recipe is a surefire hit that will impress everyone at your next gathering.
Print
Magnolia Bakery’s Famous Banana Pudding
- Total Time: 20 minutes + 4 hours refrigeration
- Yield: Serves 6–8 people 1x
Description
This creamy, sweet banana pudding is a beloved dessert from the iconic Magnolia Bakery. With layers of vanilla wafers, bananas, and homemade pudding, it’s a perfect treat for any occasion!
Ingredients
-
14 oz can sweetened condensed milk
-
1½ cups ice cold water
-
3.4 oz package instant vanilla pudding mix (Jell-O brand is recommended)
-
3 cups heavy cream
-
11 oz box vanilla wafers (Nabisco Nilla Wafers are recommended)
-
5 ripe bananas, sliced
Instructions
-
Make the Pudding:
In a large bowl, whisk together the sweetened condensed milk, ice cold water, and instant vanilla pudding mix. Whisk until the mixture begins to thicken, about 2 minutes. -
Whip the Cream:
In a separate bowl, beat the heavy cream with an electric mixer until stiff peaks form. Gently fold the whipped cream into the pudding mixture, being careful not to deflate the cream. -
Layer the Pudding:
In a large serving dish or individual cups, start by placing a layer of vanilla wafers at the bottom. Add a layer of sliced bananas on top of the wafers. -
Add Pudding:
Spoon a generous layer of the pudding mixture over the bananas and wafers. Repeat the layers until all ingredients are used, ending with a layer of pudding on top. -
Chill:
Cover the pudding and refrigerate for at least 4 hours, or overnight, to allow the flavors to meld and the dessert to set.
-
Serve:
Garnish with extra vanilla wafers or banana slices before serving, if desired.
Notes
-
Storage: This pudding can be stored in the refrigerator for up to 2 days.
-
Make-Ahead: The pudding is best when allowed to set overnight to let the flavors develop fully.
- Prep Time: 20 minutes
- Cook Time: 0 minutes (refrigeration time: 4 hours or overnight)
- Category: Dessert
- Method: No-bake, Mixing
- Cuisine: American
Keywords: Banana pudding, Magnolia Bakery, banana dessert, no-bake pudding