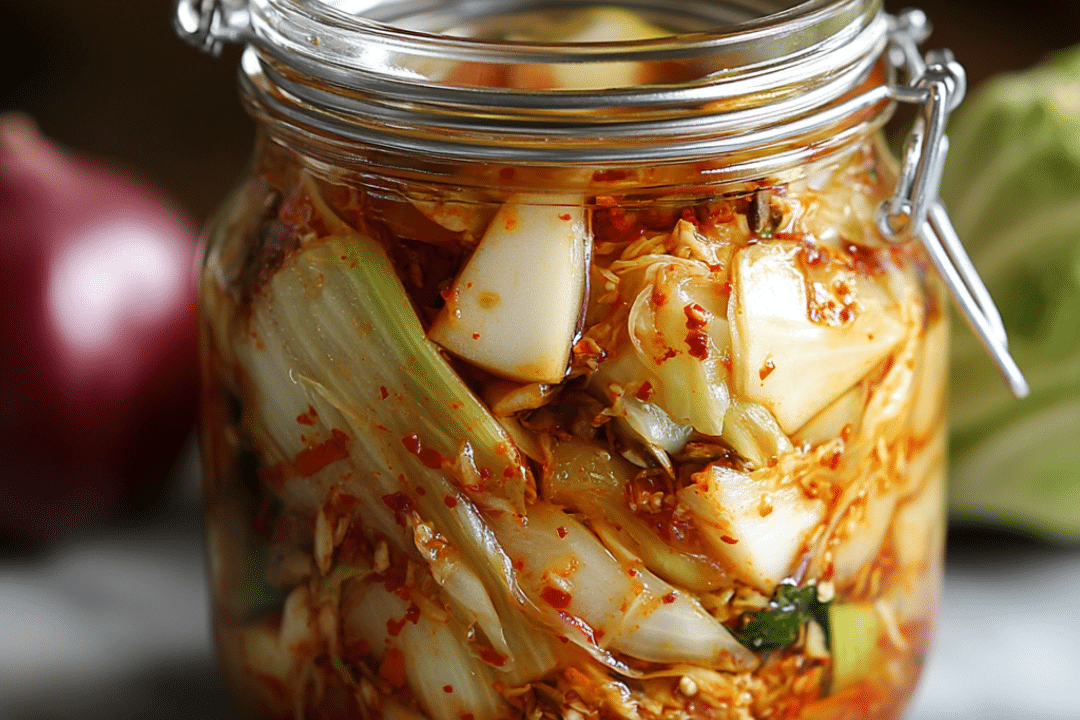
Kimchi is a staple in Korean cuisine, known for its bold, spicy, and tangy flavor. Traditionally made with fermented vegetables, it is often served as a side dish, condiment, or even a key ingredient in various recipes. While traditional kimchi can sometimes involve complex steps or animal-based products, this easy vegan kimchi recipe simplifies the process, ensuring that anyone can make it at home. With just a few simple ingredients and a bit of patience, you’ll create a flavorful and gut-healthy snack that can be enjoyed for days.
This vegan version of kimchi uses napa cabbage, tamari, and Korean red pepper flakes for an authentic taste, while leaving out the fish sauce or other animal-derived ingredients typically found in traditional recipes. The fermentation process not only adds incredible flavor but also provides a wealth of probiotics, which are great for digestive health. Plus, it’s naturally vegan, making it suitable for a variety of dietary needs. Whether you’re a kimchi lover or trying it for the first time, this recipe is the perfect way to experience this tangy, spicy dish from the comfort of your own kitchen.
Why You’ll Love This Recipe
1. Simple and Quick Process
Making kimchi at home sounds like a big task, but this recipe is incredibly simple and straightforward, involving just a few basic ingredients and minimal preparation.
2. Packed with Probiotics
Kimchi is a fermented food, meaning it’s rich in probiotics, which are excellent for your gut health and digestion. It’s a great addition to a healthy diet.
3. Spicy and Flavorful
The combination of garlic, ginger, tamari, and Korean red pepper flakes creates a bold, spicy, and umami-rich flavor that’s sure to excite your taste buds.
4. Affordable and Customizable
Making kimchi at home is much more affordable than buying pre-made versions. Plus, you can customize it by adjusting the level of spice or adding other vegetables.
5. Long Shelf Life
Once made, your kimchi will last for a long time in the fridge, making it a convenient option to have on hand for quick meals or snacks.
Ingredients
- Napa cabbage
- Sea salt
- Fresh ginger
- Garlic
- Tamari
- Maple syrup
- Korean red pepper flakes
- Green onions
- Carrot
Variations
1. Add Daikon Radish
For an extra crunch and slightly spicy flavor, add some thinly sliced daikon radish to your kimchi mixture. This will enhance both texture and taste.
2. Sweet Kimchi
If you prefer a sweeter version, increase the amount of maple syrup or even add a splash of apple cider vinegar to balance the flavor.
3. Use Coconut Aminos Instead of Tamari
If you are looking for a soy-free version, substitute tamari with coconut aminos. This will still give a savory flavor while keeping it gluten and soy-free.
4. Incorporate Other Vegetables
Feel free to add more vegetables like zucchini, bell peppers, or even spinach for a different twist. These veggies will absorb the kimchi flavor and give it a fresh taste.
5. Milder Spice
For a less spicy version, reduce the amount of Korean red pepper flakes or use a milder chili powder instead.
How to Make the Recipe
Step 1: Prepare the Cabbage
Start by chopping the napa cabbage into bite-sized pieces. Place it in a large bowl and sprinkle with sea salt. Massage the salt into the cabbage, ensuring it’s evenly distributed. Allow the cabbage to sit for 1-2 hours so it softens and releases moisture. After this, rinse and drain the cabbage well.
Step 2: Mix the Seasonings
In a separate bowl, combine the minced ginger, garlic, tamari, maple syrup, and Korean red pepper flakes. Stir the ingredients together until they form a smooth, aromatic paste.
Step 3: Add the Vegetables
Add the rinsed cabbage to the seasoning paste. Toss everything together thoroughly to ensure all the cabbage is coated. Then, stir in the chopped green onions and julienned carrot, mixing well.
Step 4: Pack the Kimchi Into a Jar
Pack the kimchi mixture tightly into a clean glass jar, pressing down firmly to remove any air bubbles. Leave about an inch of space at the top of the jar to allow for expansion during fermentation.
Step 5: Ferment the Kimchi
Cover the jar with a lid and leave it at room temperature for 1-2 days. The kimchi will begin to ferment, developing its characteristic sour and tangy flavor. After the fermentation period, move the jar to the refrigerator to slow down the fermentation process.
Step 6: Enjoy!
After refrigeration, your vegan kimchi is ready to enjoy. The flavor will deepen and intensify as it sits in the fridge, but you can start eating it as soon as it’s fermented to your liking!
Tips for Making the Recipe
- Massage the Cabbage: Don’t skip massaging the cabbage with the salt. This helps the cabbage release its moisture, which is key for the fermentation process.
- Use Clean Jars: Ensure your jars and utensils are clean and sterilized to avoid introducing any harmful bacteria during fermentation.
- Monitor the Fermentation: Taste your kimchi after 1 day of fermentation to check the flavor. If you prefer a stronger tang, let it sit for another day or two.
- Avoid Overcrowding the Jar: When packing the kimchi into the jar, make sure to press it down but leave some space at the top to allow the kimchi to expand during fermentation.
- Fermentation Temperature: Keep the kimchi at a consistent room temperature, ideally between 65°F to 75°F, for optimal fermentation.
How to Serve
Vegan kimchi is incredibly versatile. It can be served as a side dish with rice, added to ramen or noodle bowls, mixed into salads, or used as a topping for tacos, sandwiches, and even burgers. Kimchi can also be enjoyed as a snack on its own or paired with other fermented dishes.
Make Ahead and Storage
Storing Leftovers
Once your kimchi has fermented to your liking, transfer it to the refrigerator. It will last for up to 2 weeks, and the flavors will continue to develop as it sits.
Freezing
Kimchi doesn’t freeze well because of its high water content. Freezing may change its texture and make it less crunchy. It’s best to enjoy it fresh or after fermentation.
Reheating
Kimchi is traditionally served cold or at room temperature, so there’s no need to reheat it. Just take it directly from the fridge and serve it as desired.
FAQs
1. How long does kimchi take to ferment?
Kimchi typically ferments in 1-2 days at room temperature. The longer you let it ferment, the more sour and tangy it becomes.
2. Can I make kimchi without Korean red pepper flakes?
Yes, you can substitute the Korean red pepper flakes with any chili flakes or powder of your choice, though the flavor may differ.
3. Can I use regular cabbage instead of napa cabbage?
While napa cabbage is traditional for kimchi, you can use regular cabbage if necessary. The flavor and texture may be slightly different.
4. How do I know when the kimchi is ready?
Taste it! When the kimchi reaches the desired level of sourness and the flavors are well-developed, it’s ready to eat.
5. Can I adjust the spice level?
Yes, you can adjust the amount of Korean red pepper flakes to suit your personal spice preference.
6. How can I make kimchi without garlic?
If you’re avoiding garlic, you can substitute it with a small amount of onion powder or omit it entirely for a different flavor profile.
7. Can I add sugar instead of maple syrup?
Yes, you can use sugar or another sweetener, but maple syrup helps to balance the spiciness with a natural, mild sweetness.
8. Is tamari necessary for this recipe?
Tamari is used for its savory umami flavor, but you can substitute it with soy sauce or coconut aminos for a different taste.
9. How do I store kimchi for longer?
Store kimchi in an airtight jar in the refrigerator to slow down fermentation. It will keep for up to 2 weeks.
10. Can I make kimchi without fermentation?
You can make a quick pickled version by refrigerating the kimchi immediately after mixing it, but the taste won’t be as deep and tangy as fermented kimchi.
Conclusion
This easy vegan kimchi recipe is a fantastic way to experience the bold flavors of this Korean classic in a simple, plant-based form. It’s healthy, versatile, and full of probiotics, making it a great addition to your diet. Whether you enjoy it as a side dish, a topping, or a snack, homemade kimchi offers a delicious burst of flavor that you’ll love. Try it today and discover how simple and rewarding fermenting at home can be!
Print
Easy Vegan Kimchi
- Total Time: 2 days (including fermentation)
- Yield: 6 servings 1x
Description
This Vegan Kimchi is a flavorful, fermented dish made from napa cabbage, fresh ginger, garlic, and Korean red pepper flakes. It’s tangy, spicy, and absolutely packed with probiotics. A perfect side dish for any meal, this kimchi can add a zesty punch to your plate while offering the benefits of fermentation.
Ingredients
- 1 medium head napa cabbage, chopped
- 1/4 cup sea salt
- 1 tablespoon fresh ginger, minced
- 3 cloves garlic, minced
- 1 tablespoon tamari (or soy sauce)
- 1 tablespoon maple syrup
- 1 tablespoon Korean red pepper flakes
- 2 green onions, chopped
- 1 large carrot, julienned
Instructions
- In a large bowl, combine the chopped cabbage and sea salt. Let it sit for 1-2 hours to draw out moisture from the cabbage. Afterward, rinse and drain the cabbage thoroughly to remove excess salt.
- In a separate bowl, mix together the minced ginger, garlic, tamari, maple syrup, and Korean red pepper flakes.
- Add the cabbage, chopped green onions, and julienned carrot to the bowl with the spice mixture. Toss everything together to coat the vegetables evenly with the seasoning.
- Pack the mixture tightly into a clean glass jar, pressing down firmly to remove air bubbles. This will help with the fermentation process.
- Cover the jar with a lid and leave it at room temperature for 1-2 days to ferment. Afterward, transfer the kimchi to the refrigerator to continue fermenting and develop its flavor.
- Enjoy your homemade vegan kimchi as a side dish or topping for your favorite meals!
Notes
- You can adjust the amount of red pepper flakes depending on how spicy you like your kimchi.
- The fermentation time can vary depending on the temperature of your kitchen. Warmer temperatures will speed up the fermentation process.
- For a milder kimchi, you can reduce the amount of garlic and ginger.
- The kimchi will continue to ferment slowly in the fridge, becoming tangier over time.
- Prep Time: 2 hours (includes resting and draining the cabbage)
- Cook Time: 0 minutes (fermentation is not cooked)

