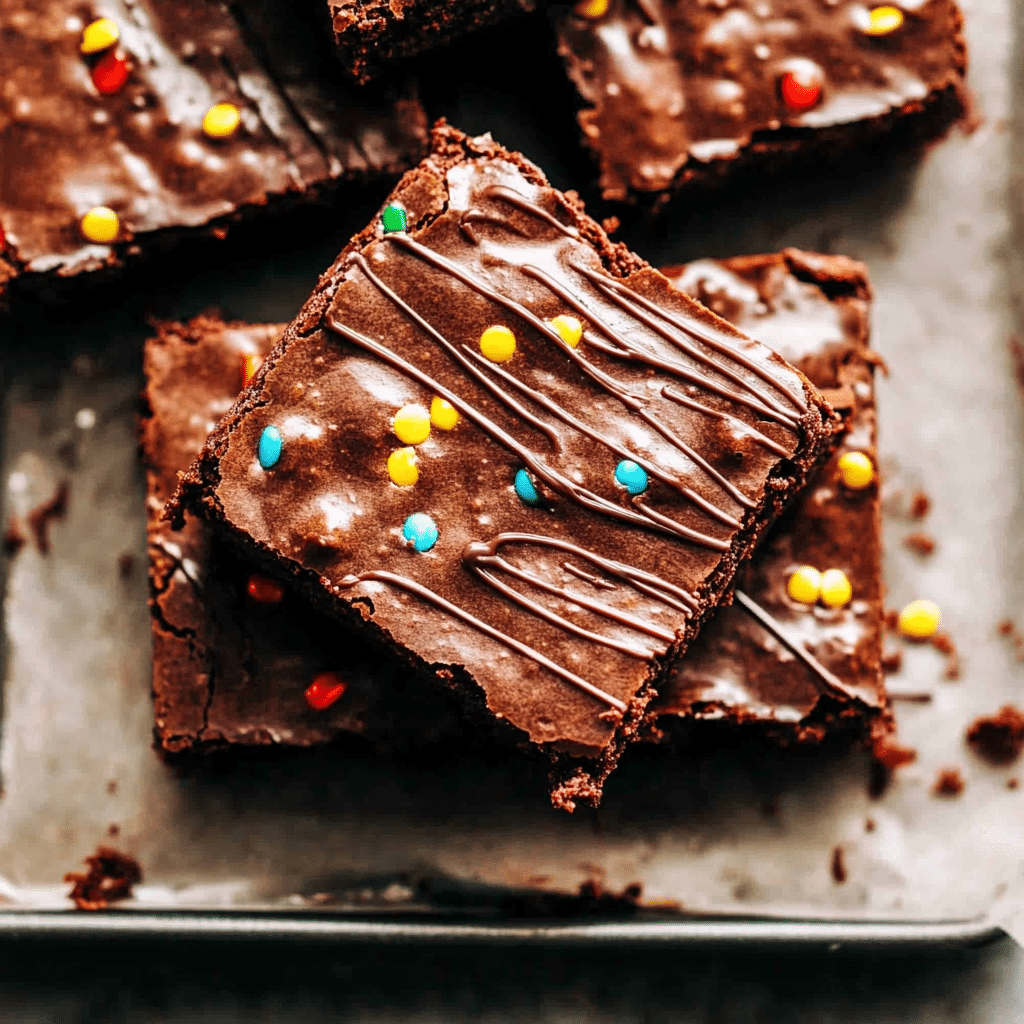
There’s something nostalgic and heartwarming about a thick, fudgy brownie with a glossy, sweet frosting—and Lunch Lady Brownies deliver exactly that. Named after the classic school cafeteria treat, these brownies are rich, moist, and incredibly chocolatey, just like the ones many remember from childhood. Simple to make and deeply satisfying, this old-fashioned dessert has made a big comeback thanks to its timeless flavor and crowd-pleasing appeal.
These brownies are everything a chocolate lover could want: dense and chewy, with a deep cocoa flavor and topped with a smooth chocolate icing that sets beautifully. Unlike boxed brownies or fancy bakery versions, lunch lady brownies have a rustic charm—no frills, just pure chocolate comfort. They’re perfect for potlucks, bake sales, after-school snacks, or anytime you need a sweet pick-me-up. Made with pantry staples and requiring minimal effort, this is the kind of dessert recipe you’ll turn to again and again. Whether you’re reliving a childhood memory or discovering these for the first time, lunch lady brownies are sure to become a favorite.
Why You’ll Love This Recipe
- Fudgy Texture – These brownies are thick, chewy, and perfectly moist with every bite.
- Simple Ingredients – Made with basic pantry staples you probably already have.
- Old-School Flavor – Brings back comforting memories of school lunches and home baking.
- Perfect Frosting – A glossy chocolate icing that melts into the warm brownies for a rich finish.
- Feeds a Crowd – Ideal for parties, potlucks, or family gatherings.

Ingredients
- Unsalted butter
- Granulated sugar
- Eggs
- Vanilla extract
- All-purpose flour
- Unsweetened cocoa powder
- Salt
- Baking powder
- Milk
- Powdered sugar
Variations
- Nutty Twist: Add chopped walnuts or pecans for crunch and flavor.
- Espresso Kick: Mix in a bit of instant coffee to deepen the chocolate taste.
- Peanut Butter Swirl: Add dollops of peanut butter and swirl before baking.
- Mint Chocolate: Add a touch of peppermint extract to the frosting.
- Gluten-Free Version: Use a 1:1 gluten-free flour blend to make it celiac-friendly.
How to Make the Recipe
Step 1
Preheat your oven to 350°F (175°C) and grease a 9×13-inch baking dish or line it with parchment paper.
Step 2
In a saucepan, melt the butter over medium heat. Remove from heat and stir in sugar until well combined.
Step 3
Add eggs and vanilla to the butter mixture and whisk until smooth.
Step 4
In a separate bowl, combine flour, cocoa powder, salt, and baking powder.
Step 5
Gradually stir the dry ingredients into the wet mixture until a thick batter forms.
Step 6
Spread the batter evenly into the prepared baking dish and bake for 25–30 minutes, or until a toothpick inserted in the center comes out with a few moist crumbs.
Step 7
While the brownies bake, prepare the frosting by mixing together melted butter, cocoa powder, powdered sugar, milk, and vanilla until smooth.
Step 8
As soon as the brownies come out of the oven, spread the frosting evenly over the warm surface. Let cool completely before cutting.
Tips for Making the Recipe
- Don’t overbake—brownies should still be slightly soft in the center when removed.
- Spread frosting while the brownies are warm for the smoothest finish.
- Use high-quality cocoa powder for the richest chocolate flavor.
- Let the brownies cool completely for cleaner cuts and firmer texture.
- Store in the fridge if you want the frosting to set more firmly.

How to Serve
- Serve plain or with a glass of cold milk for a classic combo.
- Top with a scoop of vanilla ice cream for a decadent dessert.
- Cut into small squares for a bake sale or party tray.
- Sprinkle with mini chocolate chips or chopped nuts before frosting sets.
- Add a dusting of powdered sugar for an elegant touch.
Make Ahead and Storage
Storing Leftovers
Keep brownies in an airtight container at room temperature for up to 4 days. Refrigeration extends shelf life to about 7 days.
Freezing
Wrap brownies tightly in plastic wrap and place in a freezer bag. Freeze for up to 3 months. Thaw at room temperature before serving.
Reheating
To enjoy warm, microwave a brownie square for 10–15 seconds. If frosted, be careful not to overheat to avoid melting the icing.
FAQs
1. Can I use boxed brownie mix instead?
You can, but the homemade version has a richer, more authentic lunch lady taste.
2. Why frost the brownies while warm?
The frosting melts slightly into the top layer, creating a smooth, decadent glaze.
3. Can I double the recipe?
Yes, just use a larger pan or bake in two separate dishes. Adjust baking time as needed.
4. Do these brownies taste like cake?
No, they’re much denser and fudgier than cake brownies.
5. Can I reduce the sugar?
You can slightly reduce sugar, but it may alter texture and sweetness balance.
6. Is it okay to skip the frosting?
Yes, but the frosting is a key part of what makes them “lunch lady” style.
7. Can I make them in advance?
Definitely. They taste even better the next day once the flavors have set.
8. What kind of cocoa should I use?
Unsweetened natural cocoa powder works best, but Dutch-processed can be used for a richer taste.
9. Why are my brownies dry?
They may have been overbaked. Check for doneness at the 25-minute mark.
10. How do I get clean cuts?
Cool brownies completely and use a clean, sharp knife. Wipe the blade between cuts.

Conclusion
Lunch Lady Brownies are more than just a dessert—they’re a warm hug from the past. Their simple, fudgy base and rich frosting make them a timeless treat that’s loved by all ages. Easy to whip up with pantry staples and perfect for any occasion, this nostalgic recipe brings big flavor and bigger smiles. Whether you’re sharing them at a party or sneaking one for yourself with a cup of coffee, these brownies are sure to become a staple in your kitchen. One bite, and you’ll see why they’ve stood the test of time.
Print
Lunch Lady Brownies
- Total Time: 35 minutes
- Yield: 24 small brownies 1x
- Diet: Vegetarian
Description
Thick, fudgy, and topped with a sweet, glossy chocolate frosting, these Lunch Lady Brownies are a nostalgic, no-frills dessert that delivers maximum chocolate comfort. Inspired by the classic cafeteria treat, this easy homemade version is chewy, rich, and perfect for bake sales, potlucks, or family desserts. Made with simple pantry staples and full of old-school charm, these brownies are guaranteed to bring a smile to every bite.
Ingredients
For the Brownies:
-
1 cup unsalted butter (melted)
-
2 cups granulated sugar
-
4 large eggs
-
1 tbsp vanilla extract
-
1 1/4 cups all-purpose flour
-
1/2 cup unsweetened cocoa powder
-
1/2 tsp salt
-
1/2 tsp baking powder
For the Frosting:
-
1/4 cup unsalted butter (melted)
-
1/4 cup unsweetened cocoa powder
-
1/4 cup milk
-
2 cups powdered sugar
-
1 tsp vanilla extract
Instructions
-
Preheat oven to 350°F (175°C). Grease or line a 9×13-inch baking dish with parchment paper.
-
In a large bowl, stir melted butter and granulated sugar until combined. Add eggs and vanilla; whisk until smooth.
-
In a separate bowl, sift together flour, cocoa powder, salt, and baking powder.
-
Gradually fold dry ingredients into the wet mixture until just combined. Do not overmix.
-
Pour batter into prepared baking dish and spread evenly.
-
Bake for 25–30 minutes, or until a toothpick inserted in the center comes out with moist crumbs.
-
While brownies bake, prepare the frosting: Mix melted butter, cocoa powder, milk, powdered sugar, and vanilla until smooth.
-
Spread frosting over brownies while they are still warm.
-
Allow brownies to cool completely before slicing.
Notes
Use high-quality cocoa powder for deeper chocolate flavor.
Spread the frosting while brownies are warm for the smoothest, melt-in effect.
Store in the fridge if you prefer a firmer frosting.
Let brownies cool completely for clean slicing.
Add chopped nuts or mini chocolate chips for extra texture.
- Prep Time: 10 minutes
- Cook Time: 25 minutes
- Category: Dessert
- Method: Baking
- Cuisine: American
Keywords: brownies, lunch lady brownies, fudgy brownies, chocolate dessert, classic brownies