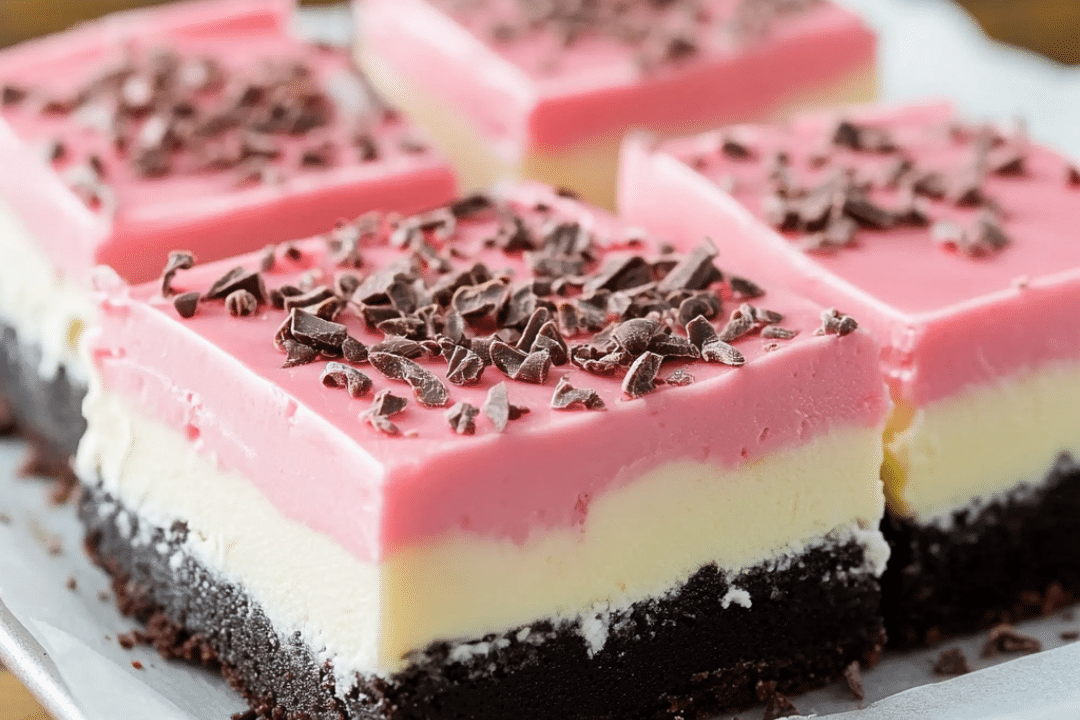
No-Bake Oreo Cheesecake is the perfect dessert for those who love the combination of rich, creamy cheesecake with the iconic crunch of Oreo cookies. This easy-to-make dessert eliminates the need for an oven, yet delivers an indulgent treat that’s sure to please any crowd. The crispy Oreo cookie crust and the smooth, airy cheesecake filling create a delightful contrast, while the added crushed Oreos within the filling enhance the flavor. Whether you’re a seasoned baker or someone looking for a quick and delicious dessert, this no-bake cheesecake will become a favorite in your recipe collection.
This dessert is not only easy to prepare, but it also requires just a few basic ingredients, most of which you likely already have in your kitchen. With a prep time of just 15 minutes and minimal hands-on work, you can have this stunning cheesecake ready to chill in the fridge, leaving you more time to enjoy your day. The best part? It can be made ahead, which makes it an excellent choice for parties, gatherings, or as a special treat for yourself and your loved ones. Let’s dive into why you’ll love this irresistible Oreo cheesecake.
Why You’ll Love This Recipe
No-Bake Oreo Cheesecake is a dream come true for Oreo lovers and cheesecake fans alike. The combination of the crunchy, chocolatey crust with a creamy, decadent filling makes every bite a moment of bliss. This cheesecake is also highly customizable—whether you want to add more crushed Oreos to the filling, top it with additional Oreo pieces, or drizzle chocolate syrup for extra indulgence, it’s easy to make this dessert your own. Plus, the fact that it’s a no-bake recipe makes it incredibly convenient and accessible for any occasion. Whether you’re serving it at a family gathering or bringing it to a potluck, this cheesecake will certainly be the star of the show.
Ingredients
- Oreo cookie crumbs
- Butter (melted)
- Cream cheese (softened)
- Sugar
- Vanilla extract
- Heavy cream
- Crushed Oreo cookies
Variations
- Chocolate Ganache Topping: Add a layer of chocolate ganache on top of the cheesecake for a rich, glossy finish. Simply melt chocolate with a bit of heavy cream and pour it over the top before refrigerating.
- Peanut Butter Version: Incorporate peanut butter into the cream cheese mixture for a delicious twist. Swirl the peanut butter into the filling for added flavor.
- Fruit Topping: Fresh raspberries, strawberries, or blueberries can add a fruity contrast to the creamy, rich flavor of the cheesecake. You can top the cheesecake with the fruits just before serving.
- Mini Cheesecakes: For individual servings, you can make mini cheesecakes by using muffin tins or small springform pans. Just adjust the crust and filling amounts accordingly.
How to Make the Recipe
Step 1: Prepare the Crust
In a medium-sized bowl, combine the Oreo cookie crumbs and melted butter. Mix well until the crumbs are evenly coated in butter. Press the mixture into the bottom of a 9-inch springform pan to form an even crust. Set aside.
Step 2: Make the Cheesecake Filling
In a large bowl, beat the softened cream cheese until smooth and creamy. Add the sugar and vanilla extract, and mix until fully combined.
Step 3: Whip the Heavy Cream
In a separate bowl, whip the heavy cream until stiff peaks form. Be careful not to overwhip the cream.
Step 4: Combine the Mixtures
Gently fold the whipped cream into the cream cheese mixture, being careful to maintain the light and airy texture. Once combined, fold in the crushed Oreo cookies.
Step 5: Assemble the Cheesecake
Pour the cream cheese and Oreo mixture over the prepared crust in the springform pan. Spread the filling evenly with a spatula.
Step 6: Refrigerate
Refrigerate the cheesecake for at least 4 hours, or until it has fully set. For best results, refrigerate it overnight.
Step 7: Serve and Enjoy
Once set, slice the cheesecake and serve chilled. Enjoy the rich, creamy, and delicious Oreo goodness!
Tips for Making the Recipe
- Use Room Temperature Cream Cheese: To avoid lumps in your filling, ensure that the cream cheese is softened to room temperature before mixing.
- Whip the Cream Properly: Whipping the cream to stiff peaks is essential for creating a light and airy cheesecake filling. Be sure not to overwhip, or it could turn into butter.
- Press the Crust Firmly: When pressing the Oreo crust into the pan, make sure it’s packed tightly for a firm base that will hold up when sliced.
- Chill for Longer: The cheesecake will have the best texture if you allow it to chill for at least 4 hours, or even overnight. This ensures the filling sets properly.
How to Serve
No-Bake Oreo Cheesecake is best served chilled, and it’s perfect for any occasion. Serve it as a special treat for dessert at a family gathering, a birthday party, or a holiday celebration. You can garnish it with additional crushed Oreos, whipped cream, or even chocolate syrup for extra flair. It’s also great served alongside a cup of coffee or tea for an afternoon treat.
Make Ahead and Storage
Storing Leftovers
Store leftover cheesecake in an airtight container in the refrigerator. It will keep for up to 3-4 days. Just be sure to cover it well to prevent the cheesecake from drying out or absorbing any odors from other foods in the fridge.
Freezing
If you’d like to make this cheesecake in advance, you can freeze it for up to 2 months. To freeze, wrap the cheesecake tightly in plastic wrap and aluminum foil. When you’re ready to serve it, let it thaw in the refrigerator overnight before slicing.
Reheating
Since this is a no-bake cheesecake, there is no need to reheat it. Serve it chilled straight from the fridge or after thawing if frozen.
FAQs
1. Can I use a different type of cookie for the crust?
Yes, you can use any cookie you like for the crust. Graham crackers, chocolate chip cookies, or even biscotti can be substituted for Oreos if you prefer.
2. How can I make this recipe dairy-free?
To make this recipe dairy-free, substitute the cream cheese with a non-dairy cream cheese alternative, use a plant-based heavy cream, and choose dairy-free butter.
3. Can I make this without a springform pan?
Yes, you can use a regular pie dish or any other baking dish, but a springform pan makes it easier to remove the cheesecake once set.
4. How do I prevent the cheesecake from being too runny?
Be sure to properly whip the heavy cream to stiff peaks, and allow enough chilling time for the cheesecake to set completely before serving.
5. Can I add more Oreos to the filling?
Yes, you can add more crushed Oreos to the filling for a more intense Oreo flavor. Just be sure to fold them in gently so they don’t break down too much.
6. Can I use homemade whipped cream instead of store-bought?
Absolutely! You can make your own whipped cream using heavy cream and sugar. Just ensure it’s whipped to stiff peaks before folding it into the cream cheese mixture.
7. How long does the cheesecake need to set in the refrigerator?
The cheesecake needs at least 4 hours to set, but overnight is ideal for the best texture and flavor.
8. Can I top the cheesecake with something other than Oreos?
Yes, feel free to top the cheesecake with additional toppings like chocolate sauce, fresh fruit, or even more crushed Oreos for added texture.
9. How can I make this cheesecake even richer?
To make the cheesecake richer, you can add a layer of chocolate ganache on top before chilling or mix in some melted chocolate into the cream cheese filling.
10. Can I serve this cheesecake at room temperature?
While this cheesecake is best served chilled, you can leave it at room temperature for a short period before serving. Just make sure to refrigerate any leftovers.
Conclusion
No-Bake Oreo Cheesecake is a delectable dessert that combines the best of both worlds—creamy cheesecake and crunchy, chocolatey Oreos. With minimal effort and no baking required, this recipe is perfect for both novice and experienced bakers. Its irresistible flavor and smooth texture are guaranteed to be a hit at any gathering. Whether you’re making it for a special occasion or simply as a treat for yourself, this no-bake cheesecake is sure to impress!
Print
No-Bake Oreo Cheesecake
- Total Time: 4 hours 15 minutes (including refrigeration time)
- Yield: 8 servings 1x
Description
This No-Bake Oreo Cheesecake is a creamy, decadent dessert that combines the rich, smooth texture of cheesecake with the irresistible crunch of Oreo cookies. With a buttery Oreo crust, a fluffy cream cheese filling, and crushed Oreos mixed in, this cheesecake is the perfect treat for any occasion, without the need to turn on your oven.
Ingredients
- 2 cups Oreo cookie crumbs
- 1/4 cup butter, melted
- 16 oz cream cheese, softened
- 1/2 cup sugar
- 1 tsp vanilla extract
- 1 cup heavy cream
- 1 cup crushed Oreo cookies
Instructions
- In a medium bowl, mix together Oreo cookie crumbs and melted butter. Press the mixture into the bottom of a 9-inch springform pan to form the crust.
- In a large bowl, beat the cream cheese until smooth. Add sugar and vanilla extract, mixing until well combined.
- In a separate bowl, whip the heavy cream until stiff peaks form. Gently fold the whipped cream into the cream cheese mixture until well incorporated.
- Fold in the crushed Oreo cookies, ensuring they are evenly distributed throughout the filling.
- Pour the mixture over the prepared crust in the springform pan.
- Refrigerate for at least 4 hours, or until the cheesecake is set.
- Serve chilled and enjoy!
Notes
- For extra Oreo flavor, feel free to add additional crushed Oreo cookies on top of the cheesecake before serving.
- If you don’t have a springform pan, you can use a regular pie pan, but make sure to chill the cheesecake thoroughly to ensure it sets properly.
- You can drizzle some chocolate or caramel sauce over the cheesecake for an added touch of flavor.
- Prep Time: 15 minutes
- Cook Time: 0 minutes (no baking required)

