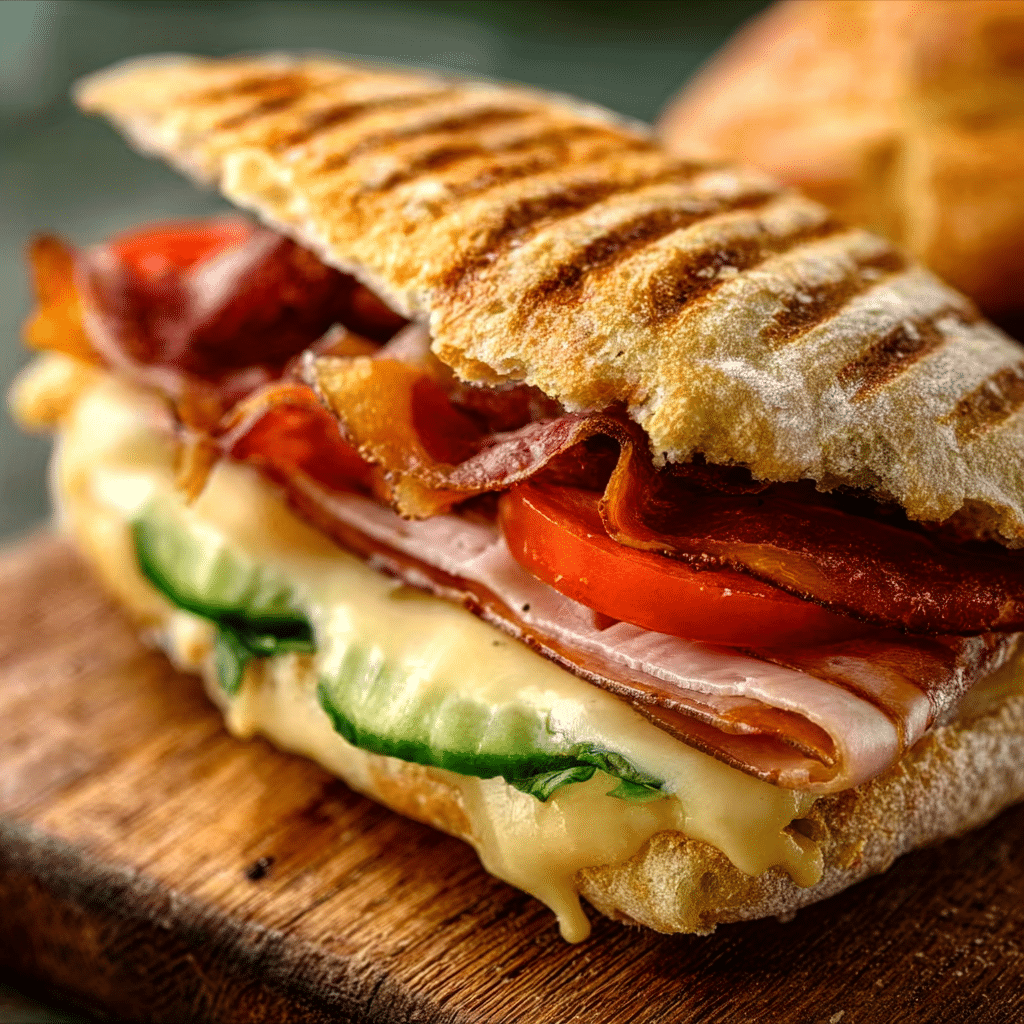
If you’ve ever craved a crispy yet soft sandwich, then Panini Bread is your new best friend in the kitchen. This versatile bread is the perfect base for grilling those favorite fillings into golden, crunchy sandwiches bursting with flavor. Whether you’re a seasoned cook or just starting out, these easy Panini Bread recipes will become your go-to for quick meals that never compromise on taste or texture. Let’s dive into these simple, delicious recipes you can make right at home today!
Why You’ll Love This Recipe
- Easy to Make: Requires minimal ingredients and comes together quickly, ideal for busy days or last-minute meals.
- Crispy Yet Soft Texture: Achieves the perfect balance of crunch on the outside and fluffy on the inside, making every bite satisfying.
- Customizable: Whether you prefer your Panini Bread with herbs, seeds, or plain, you can adjust flavors to suit your style.
- Versatile Pairing: Complements a wide range of sandwiches, from classic Italian to vegan and vegetarian options.
- Cost-Effective: Homemade Panini Bread saves money while providing fresher, healthier alternatives to store-bought versions.
Ingredients You’ll Need
Simple, wholesome ingredients form the foundation for these Panini Bread recipes. Each element plays a role—from giving structure to adding flavor and creating that irresistible texture.
- All-Purpose Flour: The backbone of the dough, providing the right gluten for chewiness and structure.
- Warm Water: Activates the yeast and hydrates the flour for perfect dough consistency.
- Active Dry Yeast: Essential for the rise, creating light, airy pockets inside the bread.
- Olive Oil: Adds moisture and richness while helping to achieve that golden crust.
- Salt: Enhances the overall flavor, balancing the sweetness of the dough.
- Sugar: Feeds the yeast and helps with browning during baking for a beautiful crust.
Variations for Panini Bread
One of the best parts about Panini Bread is how adaptable it is to your taste buds and pantry. Feel free to experiment with these ideas to keep your homemade Panini exciting and delicious.
- Herb-Infused: Add dried oregano, rosemary, or thyme to the dough for a fragrant twist.
- Whole Wheat Blend: Substitute half the all-purpose flour with whole wheat for a nuttier flavor and extra fiber.
- Seed Topping: Sprinkle sesame seeds, sunflower seeds, or poppy seeds on top before baking for added crunch and visual appeal.
- Garlic Butter Glaze: Brush baked bread with garlic-infused butter for a savory, aromatic finish.
- Gluten-Free Adjustment: Use a gluten-free flour mix designed for bread to make a tasty alternative for sensitivities.

How to Make Panini Bread
Step 1: Prepare the Yeast Mixture
Start by dissolving the active dry yeast and sugar in warm water (around 110°F) and let it sit for about 5 to 10 minutes until it becomes frothy. This step ensures your yeast is alive and ready to help the dough rise.
Step 2: Mix Dry and Wet Ingredients
In a mixing bowl, combine the all-purpose flour and salt. Create a well in the center and pour in the yeast mixture along with olive oil. Stir until a rough dough forms.
Step 3: Knead the Dough
Transfer the dough onto a lightly floured surface and knead for about 8 to 10 minutes until smooth and elastic. Proper kneading develops gluten, giving your Panini Bread its signature texture.
Step 4: First Rise
Place the dough in a lightly greased bowl, cover with a clean cloth or plastic wrap, and let it rise in a warm place for 1 to 1.5 hours, or until it doubles in size.
Step 5: Shape the Bread
Punch down the dough to release air and shape it into a rough loaf or smaller individual Panini-sized pieces. Place on a baking tray lined with parchment paper.
Step 6: Second Rise
Cover again and let the dough rise for about 30-45 minutes. This second proofing gives the bread a lighter crumb and better oven spring.
Step 7: Bake to Perfection
Preheat your oven to 425°F (220°C). Optionally, score the top of the loaf with a sharp knife for texture. Bake the bread for 20-25 minutes or until golden brown and hollow-sounding when tapped.
Step 8: Cool Completely
Let your Panini Bread cool on a wire rack before slicing; this prevents it from becoming gummy and helps maintain its crisp crust.
Pro Tips for Making Panini Bread
- Use Warm, Not Hot Water: Water too hot can kill yeast, so aim for lukewarm to activate it properly.
- Knead Thoroughly: Well-kneaded dough results in better structure and that perfect chewy texture.
- Don’t Rush the Rise: Give your dough ample time to double in size for the best airy results.
- Score the Dough: Light cuts on top help control expansion and give your Panini Bread a classic look.
- Allow Cooling: Always cool bread completely before slicing to preserve texture and avoid sogginess.
How to Serve Panini Bread
Garnishes
Add fresh herbs like basil or oregano atop your sandwiches to brighten flavors or drizzle with olive oil and balsamic reduction for an elegant touch.
Side Dishes
Pair your Panini Bread sandwiches with crisp salads, roasted vegetables, or a hearty soup for a well-rounded meal that satisfies every craving.
Creative Ways to Present
Try slicing the Panini Bread diagonally for the perfect handheld portion, or create mini Panini sliders for parties and gatherings to impress guests with ease.
Make Ahead and Storage
Storing Leftovers
Keep leftover Panini Bread in an airtight container or resealable bag at room temperature for up to two days to maintain freshness and crispness.
Freezing
Slice and wrap the bread tightly in plastic wrap and aluminum foil, then freeze for up to three months. This way, you can enjoy homemade Panini Bread anytime without waste.
Reheating
To revive that crispy crust, reheat slices in a toaster oven or on a skillet. Avoid microwaving to prevent sogginess and maintain texture integrity.
FAQs
What is Panini Bread?
Panini Bread is a type of Italian bread known for its crispy crust and soft, airy interior, perfect for grilled sandwiches called paninis.
Can I use different flours for Panini Bread?
Yes! You can experiment with whole wheat, spelt, or gluten-free blends to suit dietary preferences, though texture and rise may vary slightly.
Do I need a special Panini press to use this bread?
No special equipment is necessary; you can grill Panini Bread sandwiches on a stovetop grill pan, regular skillet, or electric grill for delicious results.
How long does homemade Panini Bread last?
Fresh Panini Bread is best eaten within 2 days when stored at room temperature, but freezing extends its shelf life considerably.
Can I add flavors directly into the Panini Bread dough?
Absolutely! Herbs, garlic, or spices can be mixed into the dough before rising to create flavorful variations tailored to your taste.
Final Thoughts
Getting creative with Panini Bread at home opens the door to endless sandwich possibilities that are both crispy and hearty. With simple ingredients and easy steps, you can whip up fresh bread that tastes better than anything store-bought, turning quick meals into memorable bites. So go ahead—grab your apron, try out these recipes, and savor the magic of homemade Panini Bread today!