Discover a simple recipe for Red Velvet Marble Waffles that are fluffy, vibrant, and perfect for a delicious breakfast or dessert treat! These waffles combine the rich flavor of velvet cake with the fun swirl pattern of marble, creating a stunning and tasty dish that will brighten up your mornings or wow guests at brunch. With just a handful of ingredients and straightforward steps, you’ll have a stack of beautifully red and chocolatey waffles ready in no time.
Why You’ll Love This Recipe
- Vibrant and Fun: The swirling marble effect makes every waffle visually appealing and exciting to eat.
- Fluffy Texture: Achieve a light, airy waffle that’s crispy on the outside and tender inside.
- Simple Ingredients: Uses basic pantry staples, making it easy to whip up anytime.
- Versatile Treat: Perfect for breakfast, brunch, or even a sweet dessert with your favorite toppings.
- Quick Preparation: The recipe comes together fast, so you can enjoy homemade waffles without a long wait.
Ingredients You’ll Need
These ingredients are straightforward yet essential for crafting Red Velvet Marble Waffles with that signature flavor, texture, and color. Each component plays a key role in balancing moisture, richness, and that classic red velvet taste with a hint of cocoa.
- All-purpose flour: The base for your batter, providing structure and softness.
- Cocoa powder: Adds the subtle chocolate undertone that pairs perfectly in the marble design.
- Baking powder: Helps the waffles rise and become fluffy.
- Sugar: Balances the flavors with the right amount of sweetness.
- Salt: Enhances all the other flavors and provides balance.
- Eggs: Bind ingredients together and contribute to the rich texture.
- Milk (preferably buttermilk): Adds moisture and a slight tang for the perfect crumb.
- Vegetable oil or melted butter: Keeps the waffles tender and helps achieve a crisp exterior.
- Vanilla extract: Elevates the flavor with warm, sweet notes.
- Red food coloring: Creates the iconic red velvet color in your marble waffles.
- White vinegar: Reacts with baking powder to make the waffles lighter and adds a slight tang true to red velvet.
Variations for Red Velvet Marble Waffles
Feel free to customize Red Velvet Marble Waffles to fit your taste preferences or dietary needs. The recipe is highly adaptable, so you can play with flavors, textures, or ingredients without losing the delicious essence of this vibrant treat.
- Chocolate chips addition: Sprinkle mini chocolate chips into the batter for bursts of melted chocolate in every bite.
- Vegan version: Substitute eggs with flax eggs and plant-based milk to keep waffles fluffy and moist.
- Nutty twist: Add finely chopped walnuts or pecans for a crunchy texture contrast.
- Gluten-free option: Use a gluten-free all-purpose flour blend without changing the rest of the ingredients.
- Spiced flavor: Incorporate a pinch of cinnamon or nutmeg for cozy warmth alongside the cocoa.
How to Make Red Velvet Marble Waffles
Step 1: Prepare Dry and Wet Ingredients Separately
In one bowl, whisk together the dry ingredients: flour, cocoa powder, baking powder, sugar, and salt. In another bowl, combine the wet ingredients: eggs, milk, vegetable oil, vanilla extract, red food coloring, and white vinegar, mixing until well blended.
Step 2: Combine Wet and Dry Mixtures
Slowly add the wet ingredients into the dry bowl and gently fold them together using a spatula. Be careful not to overmix, as this will keep your waffles light and fluffy.
Step 3: Create the Marble Effect
Divide the batter roughly in half. Keep one half as is, which will be your red velvet batter, and gently mix a bit more cocoa powder into the other half for the chocolate batter. Pour alternating spoonfuls of each into your preheated waffle iron, then use a knife or skewer to swirl together, creating that beautiful marble look.
Step 4: Cook the Waffles
Close the waffle iron and cook according to your machine’s instructions, typically for 3-5 minutes, until the waffles are crisp on the outside and cooked through. Carefully remove and let them cool slightly on a rack to preserve crispness.
Step 5: Serve and Enjoy!
Stack your Red Velvet Marble Waffles high, ready to be adorned with your favorite toppings or enjoyed plain — delicious every way!
Pro Tips for Making Red Velvet Marble Waffles
- Preheat your waffle iron well: A hot surface ensures a crispy exterior and prevents sticking.
- Don’t overmix the batter: Mixing just until combined guarantees a tender texture.
- Use room temperature ingredients: This helps your batter blend smoothly and cook evenly.
- Swirl gently: Create the marble effect with light swirls to avoid blending the colors too much.
- Test one waffle first: This helps you adjust cooking time and batter consistency if needed.
How to Serve Red Velvet Marble Waffles
Garnishes
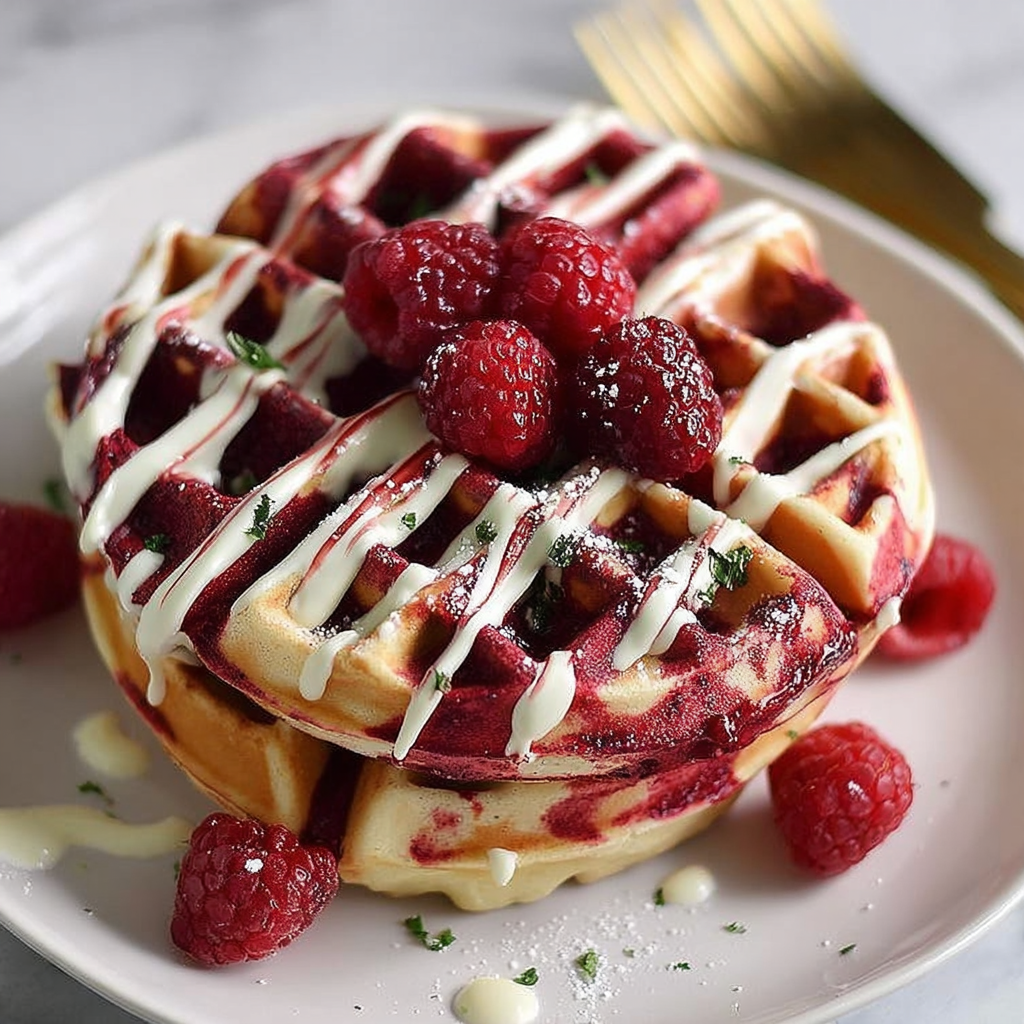
Top your Red Velvet Marble Waffles with a dollop of whipped cream, cream cheese frosting, or a drizzle of maple syrup to enhance the richness and sweetness. Fresh berries or a dusting of powdered sugar add freshness and a pretty finishing touch.
Side Dishes
Pair your waffles with fruit salad, crispy bacon, or eggs for a balanced breakfast plate. For dessert, serve alongside vanilla ice cream or a scoop of raspberry sorbet to complement the waffle’s flavors.
Creative Ways to Present
Stack multiple waffles with layers of cream cheese smoothie or frosting between them for a waffle cake. Alternatively, cut waffles into bite-sized pieces and serve with dipping sauces like chocolate ganache or cream cheese glaze for a shareable treat.
Make Ahead and Storage
Storing Leftovers
Place leftover Red Velvet Marble Waffles in an airtight container and keep them in the refrigerator for up to 3 days. To maintain crispness, place a paper towel between waffles.
Freezing
Freeze waffles by laying them in a single layer on a baking sheet until firm, then transfer to a freezer-safe bag for up to 2 months. This preserves freshness and allows for quick reheating whenever desired.
Reheating
Reheat frozen waffles in a toaster or oven at 350°F (175°C) for 5-7 minutes until warmed through and crisp. Avoid microwaving, as it can make waffles soggy instead of crunchy.
FAQs
Can I use a different type of food coloring?
Yes, gel or liquid food coloring works fine, but gel tends to provide more vibrant color without affecting the batter’s consistency.
Is it necessary to use buttermilk?
While buttermilk adds a lovely tang and tenderness, you can substitute it with regular milk plus a teaspoon of lemon juice or vinegar to mimic the effect.
Can I make these waffles dairy-free?
Absolutely! Use plant-based milk like almond or oat and replace butter with coconut oil or vegetable oil to keep the recipe dairy-free.
How do I prevent the waffles from sticking to the waffle iron?
Ensure your waffle iron is well preheated and lightly greased before pouring the batter; non-stick sprays or brushing with oil work well.
What toppings pair best with Red Velvet Marble Waffles?
Classic cream cheese frosting, whipped cream, fresh strawberries, blueberries, or a drizzle of chocolate syrup all complement the flavor perfectly.
Final Thoughts
Trying this Red Velvet Marble Waffles recipe is like waking up to a celebration on your breakfast plate. With its vibrant colors, luscious taste, and delightful texture, it’s certain to become a favorite go-to for brunches or special mornings. Take a few simple steps and a handful of ingredients, and soon enough, you’ll have an irresistible stack ready to be enjoyed by family and friends. Let yourself get creative and enjoy every bite!